Welcome to the Honeywell TH6220U2000 thermostat, a cutting-edge, programmable solution designed for precision temperature control and energy efficiency․ This user-friendly device combines advanced technology with seamless smart home integration, ensuring a comfortable and cost-effective indoor environment year-round․ The detailed manual provides comprehensive guidance for installation, operation, and troubleshooting, making it an essential resource for users․
1․1 Overview of the Honeywell TH6220U2000 Model
The Honeywell TH6220U2000 is a programmable thermostat from the T6 Pro Series, designed for advanced temperature control and smart home integration․ It offers precise temperature management, energy efficiency, and compatibility with various HVAC systems․ The thermostat features a user-friendly interface, geofencing capabilities, and remote access through smart devices․ Its compact design and mounting system ensure easy installation, while the comprehensive manual provides detailed guidance for setup and operation․ This model is ideal for homeowners seeking a modern, efficient, and customizable heating and cooling solution․
1․2 Key Features and Benefits
The Honeywell TH6220U2000 offers a high-resolution touchscreen display for easy navigation and programming․ It supports geofencing, allowing location-based temperature adjustments, and integrates seamlessly with smart home systems․ The thermostat provides advanced scheduling options, energy usage reports, and remote monitoring via the Honeywell Home app․ Its energy-efficient design helps reduce heating and cooling costs․ Additionally, it supports up to 3 heat and 2 cool stages, ensuring compatibility with various HVAC systems․ The thermostat also features adaptive recovery, which learns your system’s operation to reach set points efficiently, and smart alerts for system issues․ These features enhance comfort, convenience, and energy savings․
1․3 Importance of Proper Installation
Proper installation of the Honeywell TH6220U2000 thermostat is critical for optimal performance, safety, and efficiency․ Incorrect installation can lead to malfunctioning, inaccurate temperature control, or even system damage․ It ensures the thermostat operates efficiently, reducing energy bills and extending the lifespan of your HVAC system․ Proper installation also prevents safety hazards, such as electrical issues or improper heating/cooling cycles․ Additionally, correct setup guarantees warranty validity and ensures all smart features function as intended․ Taking the time to install the thermostat correctly avoids costly repairs and ensures reliable operation for years to come․

Pre-Installation Requirements
Ensure system compatibility, gather necessary tools, and review package contents․ Follow safety guidelines and verify electrical requirements before starting the installation process for optimal results․
2․1 System Compatibility Check
Before installing the Honeywell TH6220U2000, ensure it is compatible with your HVAC system․ Verify your system type, such as heat pump, furnace, or AC, and check voltage requirements․ Confirm the thermostat supports your system’s specific needs․ Inspect wiring compatibility, noting the number of wires and terminal labels․ Ensure the thermostat meets manufacturer specifications for your heating and cooling system․ This step is crucial for proper installation and functionality․ Incompatibility can lead to performance issues․ Consult the manual or contact Honeywell support if unsure to confirm compatibility and avoid potential installation problems․
2․2 Tools and Materials Needed
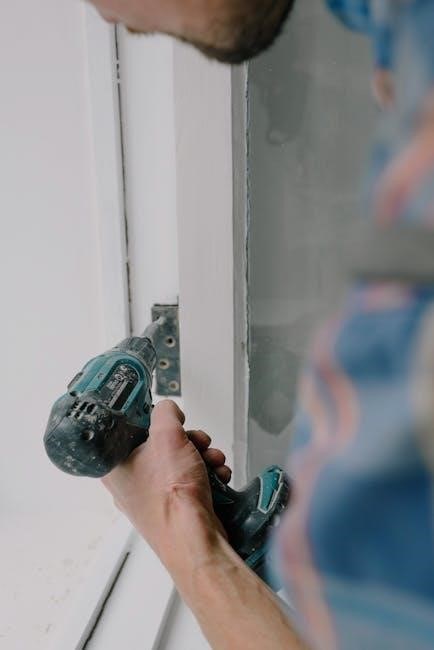
To install the Honeywell TH6220U2000 thermostat, gather the necessary tools and materials․ You will need a screwdriver (both flathead and Phillips), wire strippers, and pliers for handling wires․ A voltage tester is recommended to ensure power is off before starting․ Additionally, a drill and wall anchors may be required for mounting․ Include a level to ensure proper alignment and a ladder or step stool for safe access․ Check the thermostat package for any included accessories, such as mounting screws or wire labels․ Having all tools and materials ready will streamline the installation process and prevent delays․
2․3 Understanding the Thermostat Package Contents
The Honeywell TH6220U2000 thermostat package includes essential components for installation․ Inside, you’ll find the thermostat unit, a mounting bracket, screws for installation, and wire labels to organize connections․ A quick start guide or detailed manual is also provided to assist with setup․ Additionally, a battery may be included if required for operation․ Check the package thoroughly to ensure all items are present․ Familiarize yourself with each component before starting the installation process․ If any items are missing, contact Honeywell customer support for assistance․ Verifying the contents ensures a smooth and successful installation experience․
2․4 Safety Precautions
Before installing the Honeywell TH6220U2000 thermostat, ensure the HVAC system is turned off at the circuit breaker․ Verify the power is off using a voltage tester to avoid electrical shock․ Handle wires carefully to prevent damage or short circuits․ Avoid touching electrical components to prevent static discharge․ Wear safety gloves and eyewear for protection․ Do not force connections or bend wires excessively, as this could damage the system․ Keep the area clear of debris and ensure proper ventilation․ Failure to follow these precautions may result in injury, system damage, or void the warranty․ Always follow safety guidelines for a safe installation process․
Installation Process
The installation process involves mounting the thermostat, connecting wires, and completing the setup․ Follow the manual carefully to ensure correct installation and optimal functionality․ This ensures reliability and efficiency․
3․1 Step-by-Step Installation Guide
Begin by turning off the power to your HVAC system at the circuit breaker․ Remove the old thermostat and label the wires for easy identification․ Mount the new thermostat base to the wall using the provided screws or adhesive strip․ Connect the wires to the appropriate terminals, ensuring correct labeling (e․g;, R, W, Y, G, C)․ Reattach the faceplate and restore power․ Follow the on-screen prompts to complete the setup, including selecting your HVAC type and configuring basic settings․ Double-check all connections for accuracy and test the system to ensure proper operation․
3․2 Wiring Diagram and Connections
Refer to the wiring diagram in the Honeywell TH6220U2000 manual for precise connections․ Identify and label wires according to their functions (e․g․, R, W, Y, G, C)․ The R wire connects to the HVAC system’s power, while the W wire controls heating․ The Y wire is for cooling, and G for fan control․ The C wire provides continuous power․ Ensure wires are securely connected to the correct terminals on the thermostat․ Verify wire lengths and colors match the diagram․ If unsure, consult a professional․ Proper wiring ensures safe and efficient operation of your HVAC system․
3․3 Mounting the Thermostat
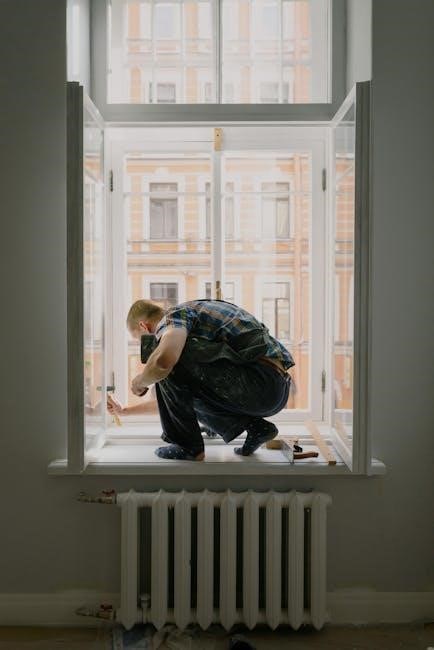
Mount the Honeywell TH6220U2000 thermostat on a flat wall surface, ensuring it is level․ Use a bubble level to confirm proper alignment․ Remove the faceplate and attach the base plate to the wall using the provided screws․ For drywall, use wall anchors for stability․ Snap the thermostat unit onto the base plate, ensuring it clicks securely․ Make sure the display is level and plumb․ Avoid mounting near direct sunlight or drafts to maintain accurate temperature readings․ Proper mounting ensures reliable performance and aesthetic installation․ Refer to the manual for specific wall type requirements, such as masonry or plaster․
3․4 Final Connections and Setup
After mounting, connect the wires to the appropriate terminals on the thermostat․ Ensure all connections are secure and match the wiring diagram․ Restore power to the HVAC system and test the thermostat’s basic functions․ Access the menu to set up initial configurations, such as time, date, and temperature units․ Pair any remote sensors if applicable․ Test the thermostat’s operation by running through heating and cooling cycles․ Confirm proper functionality before finalizing the setup․ Refer to the manual for specific setup instructions tailored to your HVAC system type․ Proper final connections ensure seamless operation and optimal performance․
Configuring the Thermostat
Configure the thermostat by setting schedules, adjusting temperature limits, and enabling smart features․ Customize settings for energy efficiency and comfort․ Ensure proper configuration for optimal performance․
4․1 Initial Setup and Programming
Start by powering on the thermostat and selecting your preferred language and unit of measurement․ Set the current date and time, then choose your system type (e․g․, heat pump, gas, or electric)․ Configure heating and cooling temperature limits to ensure safe operation․ Select the installation location (e․g․, living space or attic) to optimize performance․ Test the system to ensure all functions work correctly․ Save your settings to complete the initial setup․ Proper programming ensures the thermostat operates efficiently and meets your comfort needs․ Refer to the manual for detailed step-by-step guidance․
4․2 Setting Up Schedules
Setting up schedules on the Honeywell TH6220U2000 allows you to customize temperature settings throughout the day․ Begin by ensuring the current time and date are set accurately․ Navigate to the scheduling menu, typically found under the main settings․ From there, you can create a daily schedule with multiple temperature adjustments, such as waking up, leaving home, returning, and sleeping․ The thermostat may offer geofencing, using your smartphone’s location to adjust temperatures based on your presence․ Check if different schedules can be set for weekdays and weekends․ Test each setting and adjust as needed to optimize comfort and energy savings․ Refer to the manual for detailed guidance on advanced features like adaptive learning or maintenance reminders․
4․3 Adjusting Temperature Settings
Adjusting temperature settings on the Honeywell TH6220U2000 is straightforward․ Use the touchscreen to increase or decrease the setpoint temperature․ You can set a permanent hold to maintain a specific temperature or use temporary holds for short-term adjustments․ The thermostat also allows setting temperature ranges to prevent extreme temperatures․ For energy efficiency, enable the smart response feature, which learns your system’s behavior to reach the desired temperature just in time․ Consider setting slight adjustments during inactive periods to save energy․ Experiment with different settings to find your comfort zone, ensuring optimal energy use and personal preference balance․
4․4 Enabling Smart Features
To enable smart features on the Honeywell TH6220U2000, start by downloading and installing the Honeywell Home app․ Create an account or log in if you already have one․ Open the app, select “Add Device,” and follow the in-app instructions to connect your thermostat․ Ensure your thermostat is in Wi-Fi setup mode, then select your home network from the list and enter your password․ Once connected, you can enable features like remote access, smart scheduling, and geofencing․ These features allow you to control your thermostat from anywhere, optimize energy use, and receive system alerts for enhanced convenience and efficiency․
Advanced Features and Customization
This section explores advanced features like geofencing, smart home integration, energy-saving modes, and display customization, enhancing convenience, efficiency, and system control․
5․1 Geofencing and Location-Based Control
Geofencing allows the Honeywell TH6220U2000 to adjust temperatures based on your location․ Using your smartphone’s GPS, the thermostat learns your schedule and preferences, automatically switching to energy-saving modes when you leave home and resuming comfort settings upon your return․ This feature minimizes energy waste and enhances convenience․ Enable location-based control through the Honeywell Home app, ensuring seamless integration with your daily routine․ The thermostat adapts to your movements, providing optimal comfort and efficiency without manual adjustments․ This smart feature is particularly useful for busy households, ensuring your home is always at the right temperature when you arrive․
5․2 Smart Home Integration
The Honeywell TH6220U2000 seamlessly integrates with popular smart home systems like Amazon Alexa and Google Home․ This allows voice control and synchronization with other smart devices for a unified home automation experience․ Through the Honeywell Home app, users can control the thermostat alongside lights, security cameras, and door locks․ Smart home integration enhances convenience, enabling remote temperature adjustments and energy monitoring․ Compatible with most smart home hubs, this thermostat simplifies your routine by integrating into your existing smart ecosystem, ensuring all devices work together effortlessly for optimal comfort and efficiency․
5․3 Energy Saving Modes
The Honeywell TH6220U2000 offers advanced energy-saving modes to optimize your heating and cooling usage․ Features like Smart Recovery ensure your system reaches the desired temperature efficiently without unnecessary energy consumption․ The thermostat also supports programmable schedules, allowing you to set energy-saving temperatures during off-peak hours․ Geofencing capabilities automatically adjust settings based on your location, reducing energy waste when you’re away․ Additionally, the Energy Star certification ensures the thermostat meets energy efficiency standards, helping you save on utility bills while maintaining comfort․ These modes work seamlessly with smart home integrations for enhanced energy management․
5․4 Customizing Display Settings
The Honeywell TH6220U2000 allows users to tailor the display to their preferences․ Adjust the brightness level manually or enable auto-dimming for optimal visibility․ Choose from various backlight colors to match your home decor․ Customize the display to show current temperature, setpoint, or humidity levels․ You can also enable or disable the clock display and select between 12-hour or 24-hour formats․ Additionally, the thermostat permits locking the display to prevent accidental changes․ These settings ensure a personalized and user-friendly experience, enhancing convenience without compromising functionality․
Troubleshooting Common Issues
Troubleshoot issues like unresponsiveness, inaccurate temperatures, or connectivity problems․ Check power supply, wiring, and sensor accuracy․ Restart the thermostat or restore factory settings if needed․
6․1 Identifying Common Problems
Common issues with the Honeywell TH6220U2000 include unresponsiveness, inaccurate temperature readings, or display malfunctions․ Check for loose wiring, faulty sensors, or incorrect settings․ Ensure the thermostat is properly powered and connected․ If the display is blank, verify battery levels or electrical supply․ For temperature inaccuracies, recalibrate the sensor or ensure proper mounting․ Connectivity issues may arise from incorrect network configurations․ Always refer to the manual for specific error codes and solutions․ Regularly inspect wiring and connections to prevent operational disruptions․ Addressing these issues early ensures optimal performance and comfort․
6․2 Resetting the Thermostat
To reset the Honeywell TH6220U2000, remove the batteries and press the “RESET” button located on the back of the thermostat․ Hold it for 5-10 seconds to clear stored settings․ Reinstall the batteries and allow the thermostat to reboot․ For a factory reset, navigate to the menu, select “Factory Reset,” and confirm․ This restores default settings but retains scheduling data․ If issues persist, contact customer support for advanced troubleshooting․ Regular resets can resolve software glitches and ensure smooth operation․ Always refer to the manual for detailed reset procedures․ Resetting is a quick solution for many common operational issues․
6․3 Error Codes and Solutions
The Honeywell TH6220U2000 may display error codes indicating specific issues․ For example, “E1” typically refers to a temperature sensing problem, which can be resolved by cleaning the sensor or ensuring proper installation․ “E2” often relates to communication issues between the thermostat and the HVAC system, which may require checking wiring connections or resetting the system․ “E3” might indicate a time synchronization error, which can be fixed by reconnecting to Wi-Fi or syncing with an internet time server․ Refer to the manual for a full list of codes and troubleshooting steps to address them effectively․
6․4 Diagnosing Connectivity Issues
Connectivity issues with the Honeywell TH6220U2000 can often be resolved by checking the Wi-Fi network connection․ Ensure the thermostat is powered on and within range of the router․ Restart both the thermostat and router to establish a fresh connection․ Verify that the correct network name and password are entered․ If issues persist, check for firmware updates or reset the thermostat to factory settings․ Additionally, ensure no firewall or security settings are blocking communication․ Consult the user manual for detailed troubleshooting steps to restore connectivity and maintain smart functionality․
Maintenance and Upkeep
Regular maintenance ensures optimal performance․ Clean the screen with a soft cloth, check for software updates, and replace batteries annually․ Schedule periodic system checks․

7․1 Cleaning the Thermostat
Cleaning the Honeywell TH6220U2000 thermostat is essential for maintaining its functionality and appearance․ Use a soft, dry cloth to gently wipe the display screen and exterior surfaces․ Avoid harsh chemicals or abrasive materials, as they may damage the thermostat․ For stubborn marks, lightly dampen the cloth with water, but ensure no moisture seeps into the device․ Regularly cleaning the vents and sensors ensures accurate temperature readings and proper airflow․ Perform this maintenance every 1-2 months or as needed to prevent dust buildup․ Proper cleaning helps extend the lifespan and efficiency of your thermostat․
7․2 Updating Software
Regular software updates ensure the Honeywell TH6220U2000 thermostat operates with the latest features and security patches․ To update, navigate to the thermostat’s menu, select “Settings,” and choose “Software Update․” If an update is available, follow on-screen instructions to download and install it․ Ensure the thermostat remains powered on during the update process․ If no Wi-Fi connection is available, check that a C-wire is properly connected for internet functionality․ Updating software enhances performance, adds new features, and resolves any bugs․ Always confirm successful installation by restarting the thermostat after the update completes․
7․3 Replacing Batteries
To replace the batteries in your Honeywell TH6220U2000 thermostat, first, ensure the device is powered off to prevent any unexpected behavior․ Locate the battery compartment, typically found on the front or back of the thermostat․ Open the compartment, which may require a screwdriver․ Remove the old batteries and dispose of them properly․ Insert new AA or AAA alkaline batteries, aligning them with the polarity indicators․ Close the compartment securely․ Finally, test the thermostat to confirm it functions correctly․ Regular battery checks ensure uninterrupted operation․
7․4 Regular System Checks
Regular system checks are essential to ensure your Honeywell TH6220U2000 thermostat operates efficiently․ Start by verifying the thermostat’s display responsiveness and accuracy․ Check the temperature sensing accuracy and recalibrate if necessary․ Inspect the HVAC system’s operation to ensure proper heating and cooling responses․ Review wiring connections for any signs of damage or corrosion․ Additionally, verify that scheduled settings align with your preferences․ Perform these checks every 3–6 months to maintain optimal performance․ Refer to the owner’s manual for detailed instructions or specific recommendations tailored to your system․
Warranty and Support
The Honeywell TH6220U2000 thermostat comes with a manufacturer warranty, ensuring coverage for defects and replacements․ Honeywell also offers dedicated customer support, online resources, and extended warranty options․
8․1 Manufacturer Warranty Details
The Honeywell TH6220U2000 thermostat is backed by a limited manufacturer warranty, typically covering defects in materials and workmanship for a specified period, often two years from the date of purchase․ This warranty ensures repairs, replacements, or refunds for faulty units, provided they are used as intended․ Registration may be required to activate the warranty, and proof of purchase is necessary for claims․ The warranty does not cover damages due to misuse, improper installation, or external factors like power surges․ For full details, refer to Honeywell’s official website or the product’s legal documentation․
8․2 Customer Support Options
Honeywell offers comprehensive customer support for the TH6220U2000 thermostat, ensuring users receive assistance when needed․ Support options include a dedicated toll-free phone line for technical inquiries, available Monday through Friday during business hours․ Additionally, Honeywell’s official website provides extensive online resources, such as FAQs, troubleshooting guides, and downloadable manuals․ For less urgent concerns, customers can submit queries via email or utilize the live chat feature on Honeywell’s website․ These support channels aim to resolve issues promptly, ensuring optimal performance and user satisfaction with the thermostat․
8․3 Online Resources and Manuals
Honeywell provides extensive online resources and manuals for the TH6220U2000 thermostat, accessible through their official website․ The installation manual, user guides, and troubleshooting documents are available for download, ensuring easy access to detailed instructions․ These resources cover installation steps, programming, and maintenance tips, helping users optimize their thermostat’s performance․ Additionally, Honeywell offers FAQs and video tutorials to address common queries․ These online materials are regularly updated to reflect the latest features and improvements, making them a reliable source for users seeking assistance or clarification on specific functions․
8․4 Extended Warranty Options
Honeywell offers extended warranty options for the TH6220U2000 thermostat, providing additional protection beyond the standard manufacturer warranty․ These options can be purchased to extend coverage for repairs and replacements, ensuring long-term peace of mind; Extended warranties typically cover parts and labor for an additional period, protecting against unexpected repair costs․ Users can inquire about these options through Honeywell’s customer support or authorized dealers․ Extended warranties are ideal for those seeking enhanced protection and extended support for their thermostat, ensuring optimal performance and reliability over an extended period․